
Publish Your Unity Games in the Snap Store

Alan Pope
on 11 May 2019
Tags: sc:snap:multipass , sc:snap:snapcraft , snapcraft , snapcraft.io
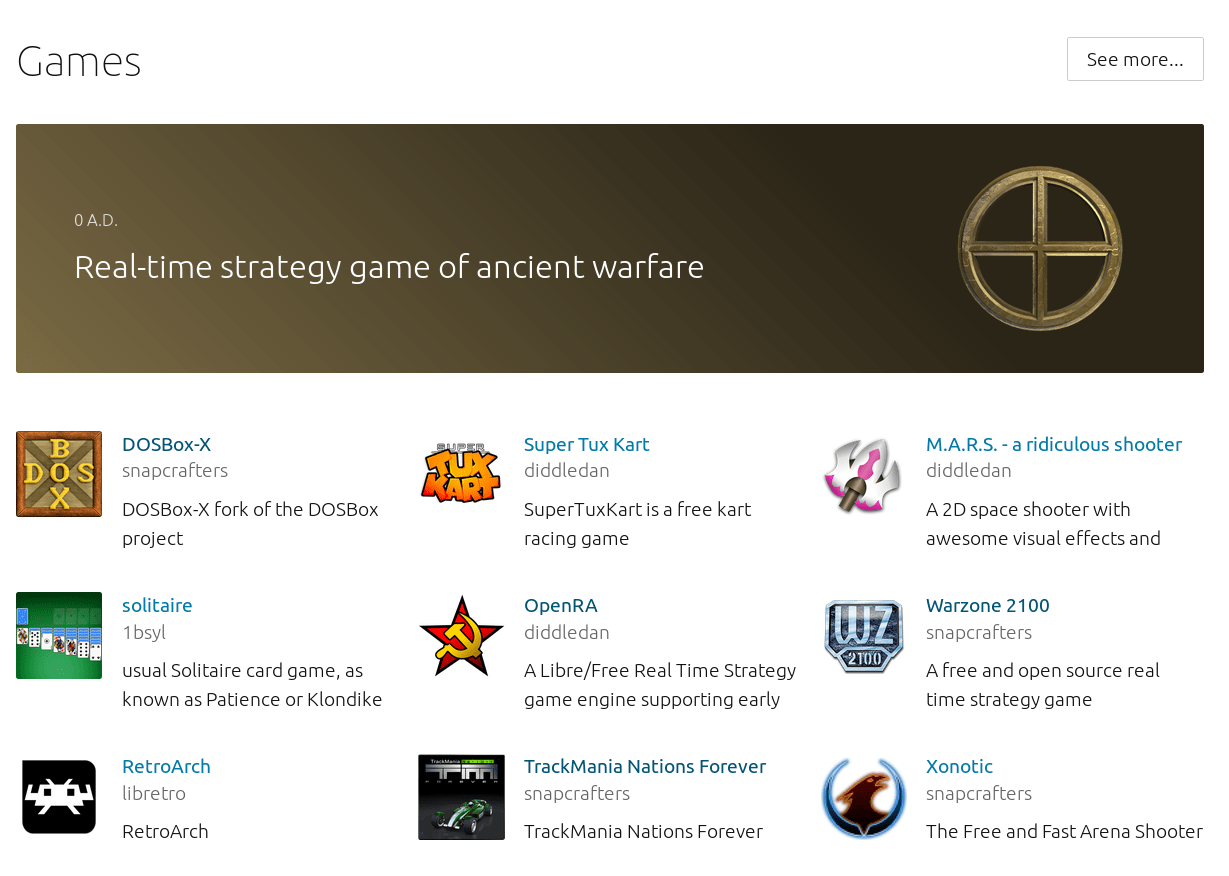
We often feature and promote applications and games in the Snap Store and via our social media channels. Perhaps unsurprisingly, games are popular among our followers, and our users. There are a few great games already in the Snap Store, but there’s always room for more!
Snap lends itself well to packaging and distributing free games to Linux users. Snap support is available for over 40 Linux distributions, so with one build of a snap, you can reach millions of Linux gamers. The same snap will work across all those distributions without you needing to test on each one.
Snaps are pretty straightforward to create, easy to publish and come with interesting Snap Store metrics. It’s also a really simple way to just share your creations with friends, no matter which of the major Linux distributions they use.
In this article we’ll go through the steps required to publish a game in the Snap Store. We’ll focus on games built using the Unity Editor, but the principles are largely the same, no matter what engine is used. So long as the engine supports creating Linux binaries, you’re good. We will be using snapcraft, a tool we created to build snaps.
Pre-requisites
In addition to your game binaries you’ll also need a computer or Virtual Machine (VM) running Linux. You may already be developing on Linux, which is great, but we know many game developers initially build on Windows or macOS, so may not have a Linux machine to hand.
Any distribution listed on the installing snapd page will work fine on bare metal.
If using a VM, use an up to date installation of Ubuntu 18.04 as the guest OS. While it may be possible to use another distribution in a VM, I’d recommend using Ubuntu 18.04. By default, snapcraft launches a VM (managed by multipass) which likely won’t work when ‘nested’ inside another VM. So when running snapcraft in a VM we will pass it a parameter to build directly, and not use multipass. This ensures we don’t build against, or incorporate libraries from the foreign Linux distribution in the build, which will compromise the ability to run the snap anywhere.
So your two options are:-
- Install a supported Linux distribution on bare metal
- Install Ubuntu 18.04 in a VM
Sign up for a store account
Signing up for a Snap Store account is just like registering for any service. It will give you secure access to manage your snaps, update the description, screenshots, icon and other metadata. It also will give access to release the snap when you’re ready, and access weekly active device metrics.
Follow the guide to setting up your developer account in the Snap Store.
Register the name of your game
Each application name is unique in the Snap Store. Registering the name of your game will reserve it for you. Some common names have been per-registered to prevent name-squatting. If the store says your game name is already taken, there is a dispute process you’re liked to, in order to request the name be assigned to you. Alternatively choose a different name, or be creative with hypens – e.g. register “space-trek” rather than “spacetrek”. The dispute process enables you to discuss the registration with a human Snap Store admin.
The process for registering is covered in more detail in the documentation.
Install snap support
Snapcraft, the tool used to build snaps, is provided as a snap itself. As such you’ll need to have access to a Linux machine which has snap support to build your game snap.
Ubuntu 16.04 and above, and some other Linux distributions ship with snap support out of the box. If you’re using something which may not, you can add support via the instructions in the documentation.
Install snapcraft & multipass
Once you have snap support, install snapcraft and (if you’re not running Linux inside a VM), multipass. If you’re already running Linux in a VM, simply skip installing multipass for now.
sudo snap install snapcraft
sudo snap install multipass --beta
Setup working directory
On the Linux machine, create a directory in which we’ll build the snap and incorporate the binary build of your game. I’ve named the folder “MyGame” but you can of course change that to whatever your game is called.
mkdir -p ~/SnapGames/MyGame/snap/local
Note: Don’t be tempted to create a folder called snap in your home directory and build in there. The snap folder in your home is reserved for snap applications themselves, and things get horribly confusing if it’s misused.
Export game from Unity3D to ~/SnapGames/MyGame/snap/local
Within the Unity Editor, choose File -> Build Settings. Select Linux as the Target Platform and x86_64 as the Architecture. Hit the Build button, then select the previously created ~/SnapGames/MyGame/snap/local directory, named “MyGame” for example.
Test the game on Linux
As a quick sanity check, run the game outside of the Unity Editor by running the binary you exported in the previous step. This is a good way to make sure everything exported correctly.
Run the executable located at:
~/SnapGames/MyGame/snap/local/MyGame.x86_64
Create a snapcraft.yaml
Snapcraft uses a simple yaml file to drive the build of a snap. I’ve provided a template below, which shouldn’t need much modification. Save it as ~/SnapGames/MyGame/snap/snapcraft.yaml
Replace content of name, version, summary, description and command at the minimum.
name should match the lowercase name you registered in the store. summary, version and description are all human readable text.
The command should match the exported binary name from Unity. Consult the reference documentation for snapcraft to learn in detail what each entry does.
Finally, modify the LD_LIBRARY_PATH entry in the apps: section which points to the folder inside the snap where the supplied Unity run-time libraries reside. Specifically modify the /MyGame_Data/ section of the path to match the data directory exported by the Unity Editor. This will typically be the name of your game, followed by “_Data”.
name: mygame
 version: "1.0"
 summary: My Awesome Game
 description: |
   This is my amazing game which will clearly win awards.
   Shoot the bad guys.
   Collect the coins.
   Avoid the traps.
 base: core18
 confinement: strict
 parts:
   mygame:
     after: [desktop-gtk2]
     plugin: dump
     source: snap/local
     stage-packages:
       - libgl1-mesa-dri
       - libglu1-mesa
       - libgl1-mesa-glx
       - libgles2-mesa
       - libflac8
       - libxcursor1
       - libxi6
       - libxinerama1
       - libxrandr2
       - libxrender1
       - libasound2
       - libasyncns0
       - libogg0
       - libpulse0
       - libsndfile1
       - libtheora0
       - libvorbis0a
       - libvorbisenc2
       - libvorbisfile3
       - libwebp6
   desktop-gtk2:
     build-packages:
       - build-essential
       - libgtk2.0-dev
     make-parameters:
       - FLAVOR=gtk2
     plugin: make
     source: https://github.com/ubuntu/snapcraft-desktop-helpers.git
     source-subdir: gtk
     stage-packages:
       - libxkbcommon0
       - ttf-ubuntu-font-family
       - dmz-cursor-theme
       - light-themes
       - adwaita-icon-theme
       - gnome-themes-standard
       - shared-mime-info
       - libgtk2.0-0
       - libgdk-pixbuf2.0-0
       - libglib2.0-bin
       - libgtk2.0-bin
       - unity-gtk2-module
       - locales-all
       - libappindicator1
       - xdg-user-dirs
       - ibus-gtk
       - libibus-1.0-5
apps:
   mygame:
     command: desktop-launch $SNAP/MyGame.x86_64
     environment:
       LD_LIBRARY_PATH: "$SNAP/MyGame_Data/Plugins/x86_64:$SNAP/usr/lib/$SNAPCRAFT_ARCH_TRIPLET/pulseaudio:$LD_LIBRARY_PATH"
     plugs:
       - x11
       - opengl
       - network
       - network-bind
       - desktop
       - desktop-legacy
       - pulseaudio
       - joystick
Create a desktop file
On Linux distributions a standard .desktop file and an icon is required. The desktop file is used to add a menu item to the players’ Linux desktop environment, so the game can be found and launched from the graphical desktop. The icon will be displayed in the menu.
Create a directory ~/SnapGames/MyGame/snap/gui
Drop a .desktop file and icon in called mygame.desktop and mygame.png in the new folder.
Change the value of exec to match the registered snap name in lower case. This should also match the line below apps: in the snapcraft.yaml.
Note: mygame.desktop and mygame.png should both match the registered name of the snap.
[Desktop Entry]

Name=MyGame

Comment=My Awesome Game

Exec=mygame

Icon=${SNAP}/meta/gui/mygame.png

Type=Application

Terminal=false

Categories=Game;
Build the snap
If running on bare metal, run snapcraft, which will spawn multipass and build the snap inside it, and copy the result out to your working directory.
When running Ubuntu 18.04 inside a Virtual Machine, launch snapcraft in ‘destructive mode’ which will build natively on the machine, and not attempt to further launch any VMs.
Note: ‘destructive mode’ is intended for use in CI systems, where the VM or container running snapcraft is likely to be thrown away after the build. You should consider this VM dedicated for use in building these snaps. Adding further packages, PPAs and other software to the VM may compromise the ability for the resulting snap to run everywhere.
cd ~/SnapGames/MyGame
snapcraft --destructive-mode
Here’s an abbreviated view of what you should see while it’s building:
$ snapcraft
Using 'snap/snapcraft.yaml': Project assets will be searched for from the 'snap' directory.
Launching a VM.
Launched: snapcraft-mygame
2019-03-20T10:06:08Z INFO Waiting for restart...
core 16-2.37.4 from Canonical✓ installed
snapcraft 3.2+git14.ge1bb1c5 from Canonical✓ installed
core18 18 from Canonical✓ installed
Pulling mygame
Building mygame
Staging mygame
Priming mygame
The execstacks are going to be cleared for the following files:
- /root/prime/MyGame.x86_64
To disable this behavior set `build-attributes: [keep-execstack]` for the part.
'grade' property not specified: defaulting to 'stable'
Snapping 'mygame'
Snapped mygame_1.0_amd64.snap
If all goes well, you should end up with a snap in the current directory.
Note: You may get warnings (in yellow) about “execstacks”. This can usually be ignored, and is simply a standard feature of snapcraft to increase security of applications published in the Snap Store.
Install the snap
Before you publish your shiny new snap and share with the world, it’s worth testing it locally. Install the snap you just created with snap install.
snap install mygame_1.0_amd64.snap --dangerous
Note: The --dangerous parameter is required to indicate you’re accepting the risk that this snap didn’t come from, and wasn’t digitally signed by the Snap Store.
Look in the desktop menu/launcher to ensure the icon appears correctly and the name of the game appears. Launch the game and check it functions as expected.
Note: If you have installed the game via some other means, you may have two icons, one for the snap you installed, and one for the non-snap install of the game.
If the game fails to launch, try running from a terminal to see if any further output hints at why.
snap run mygame
We have a friendly snapcraft forum where developers and the wider community can assist in debugging snap builds.
Push the snap to the store
Once you’re happy with your snap, you can push it to the store using snapcraft.
snapcraft push mygame_1.0_amd64.snap
The Snap Store will run an automated scan of the snap, to ensure it’s a valid snap package and is not corrupted or malformed.
Update store listing page
Now the snap is in the Snap Store, it’s time to spruce up the store page. Visit https://snapcraft.io/snaps to get a list of your snaps. From there you can manage the metadata for each one, add an icon, screenshots and a more comprehensive description. Users are more likely to install snaps which have videos, screenshots and detailed descriptions. We’ve created a guide detailing some of the ways to improve your store page.
Release the game
Once you’re ready to make the game available to the public, release it to the “stable” channel in the Snap Store. The Snap Store “releases” tab enables you to publish a revision to a channel. Once that’s done, users can find and install your snap from the store.
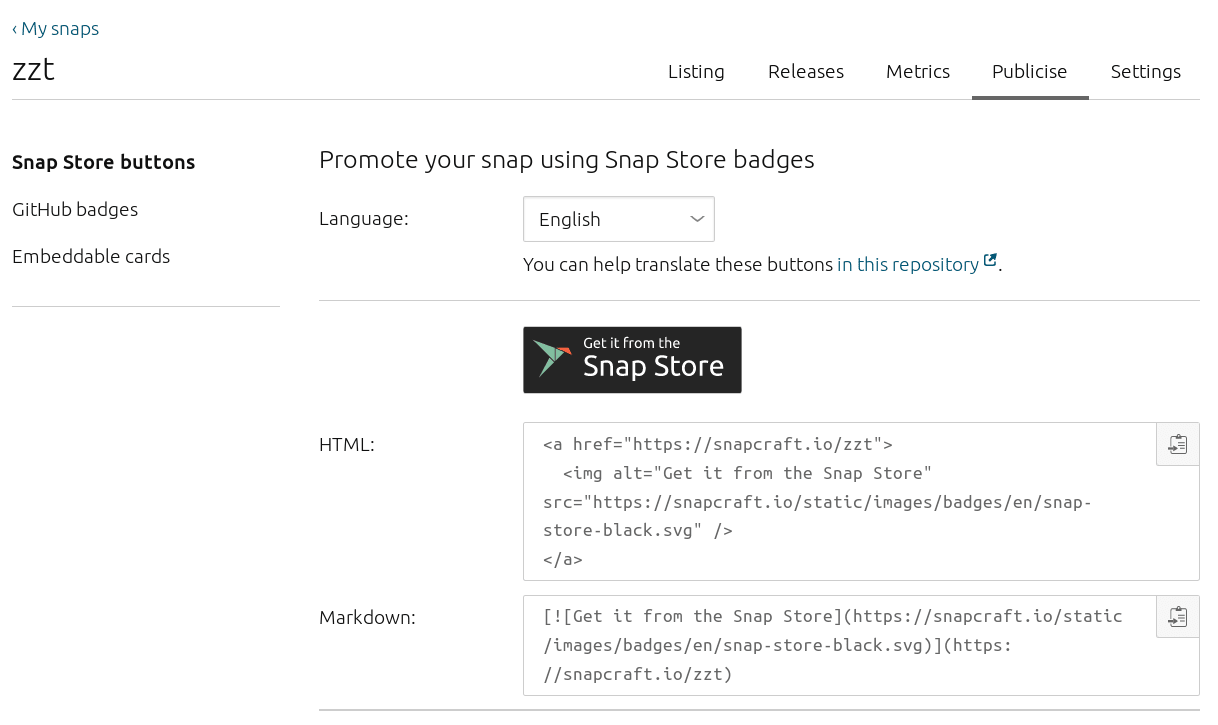
Promote it
Now it’s time to get the word out. Update your project web site to link to your store page. Promote your snapped game on social media using pre-made buttons, or links. Use the “Publicise” tab at https://snapcraft.io/snaps to grab the code for those buttons and embeddable cards.
Next steps
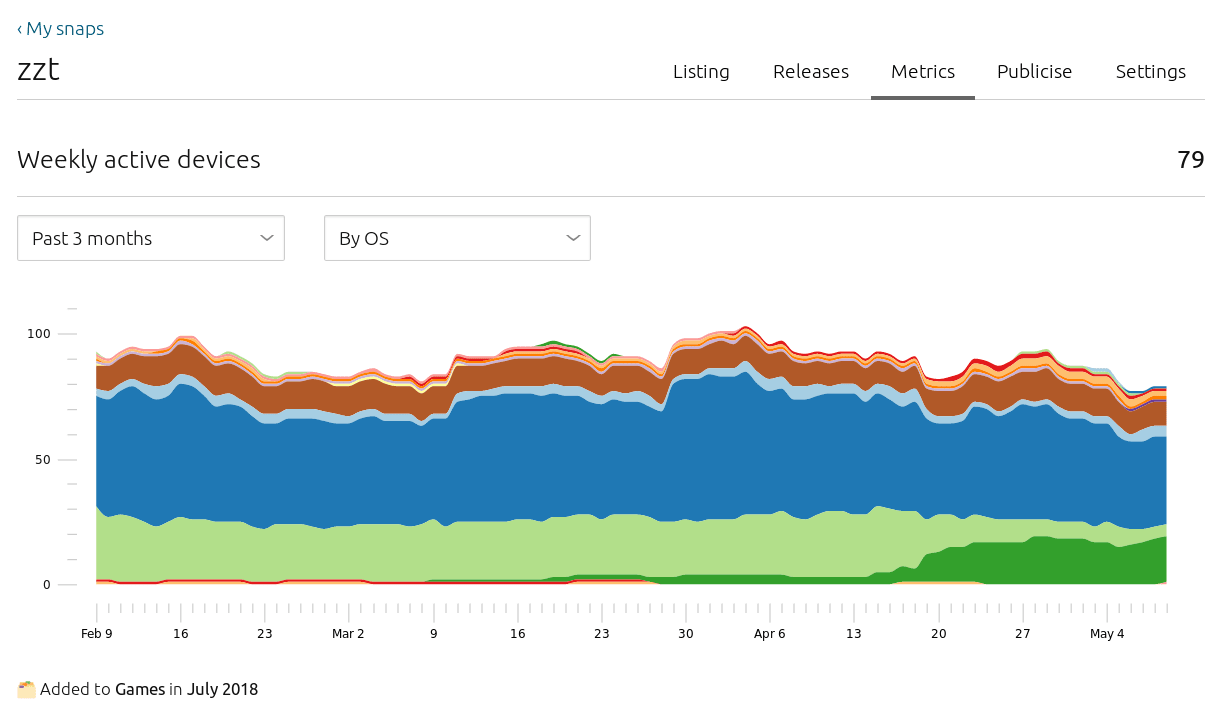
The Snap Store provides metrics so you can see how popular your new creation is, and how effective your promotion is.
The Snap Advocacy Team at Canonical love to hear about your experiences in building snaps. We take your feedback to the snapcraft and snapd teams to improve the process for yourself and the next developer. We’d also love to hear about the snaps you publish, and may even promote them on our social media channels, or feature them prominently in the store! Let us know what you make.
Photo by Reina Kousaka on Unsplash
Talk to us today
Interested in running Ubuntu in your organisation?
Newsletter signup
Related posts
Snapcraft 8.0 and the respectable end of core18
‘E’s not pinin’! ‘E’s passed on! This base is no more! He has ceased to be! ‘E’s expired and gone to meet ‘is maker! ‘E’s a stiff! Bereft of life, ‘e rests in...
Craft team welcomes you to another episode of its adventures
Welcome to the second article in the Craft team saga. Previously, on Craft Team, we gave you a brief introduction into the team’s function, we announced our...
Snapcrafters: 2022 wrap-up
This article was written by Merlijn Sebrechts and Dani Llewellyn from the Snapcrafters community. ===== Last year, we officially re-launched the...